
Tach.
22 Jun
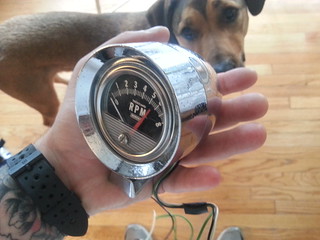
Scored an old three wire DixCo tachometer on the ’47-55 AD Tech and Swap Meet fb page. Works great! Took it apart to clean it up and change the bulb color from green to white/clear.
22 Jun
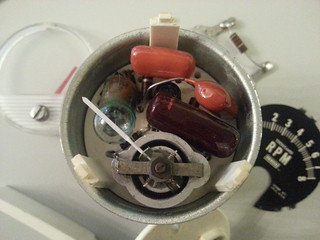
Scored an old three wire DixCo tachometer on the ’47-55 AD Tech and Swap Meet fb page. Works great! Took it apart to clean it up and change the bulb color from green to white/clear.
1 Feb
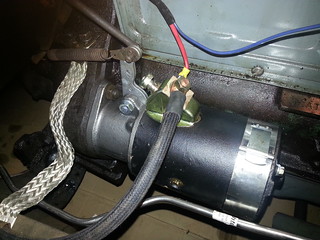
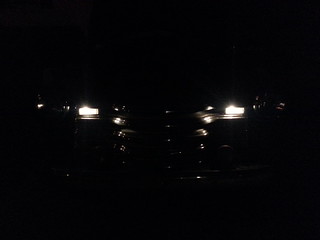
The only items I didn’t replace when I rewired Bessie were the front marker lamps, the generator, starter and the main power cable. The good news is, the marker lamps work great!
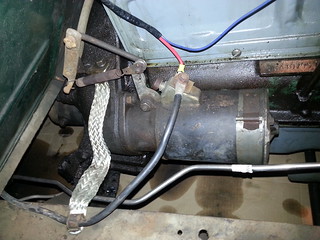
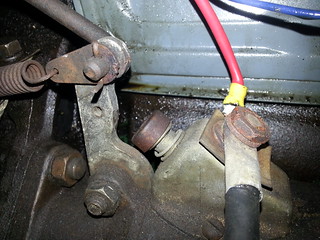
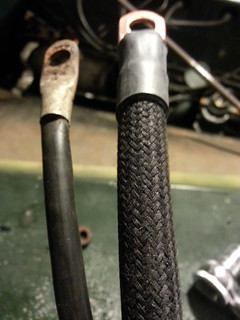
…but she’s been slow starting for a while now. My guess is the issue is between the battery and the starter. Battery tested fine which means the generator is doing it’s job and I knew the main cable was replaced at some point with a plastic covered one. I didn’t realize until just recently that the cable wasn’t the right gauge (it’s a #4 and it should be a #1) and therefore probably not able to supply enough power.
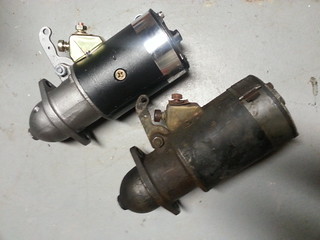
Been collecting parts to do it for a several weeks now and the new 6v starter arrives tomorrow morning. I’ll be pulling the old starter out tomorrow afternoon and replacing the main cable along with a couple other minor miscellaneous items that have been on my to-do list for a while now. …horn contact, dome light, etc.
UPDATE:
Got the starter and main cable replaced and now she starts sans hesitation every time!
17 Nov
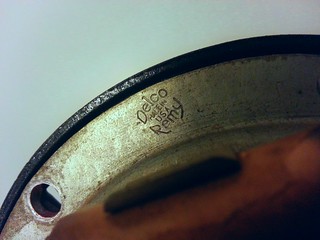
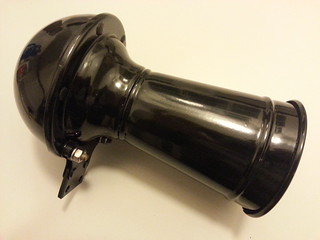
The original 6v Delco Remmy horn is done! Just I was getting sick of yelling “HONK!” along with a few choice expletives every time someone cut me off.
Aug. 4, 2012
Sounds great, just needs paint.
(Cool site on the Delco Remy Division of GM – http://www.delcoremyhistory.com/Products/horns.htm)
.
Oct. 13, 2012
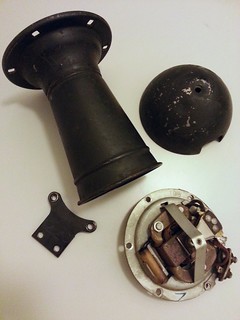
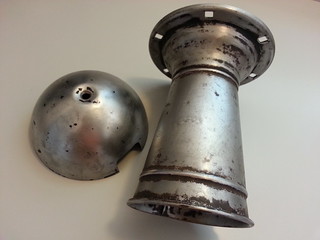
Baby steps… Finally got the paint stripped.
.
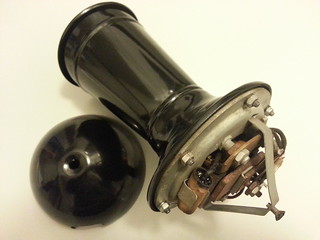
Nov. 17, 2012
Shot, chipped, sanded, reshot, assembled and ready to mount!
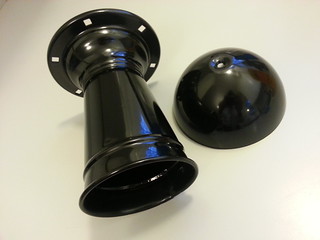
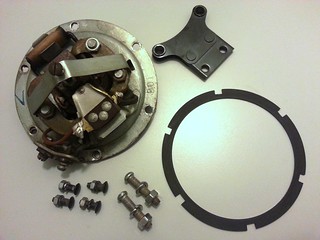
Made a new seal out of an extra oil filter gasket I had.
.
13 Oct
Aug. 4, 2012
Sounds great, just needs paint.
(Cool site on the Delco Remy Division of GM – http://www.delcoremyhistory.com/Products/horns.htm)
.
Oct. 13, 2012
Baby steps… Finally got the paint stripped.
13 Oct
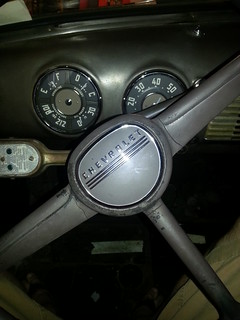
Got the new mast bearing and steering wheel on Monday and installed it all on Tuesday. Went with the repopped version over NOS for a couple reasons…
One, the wire. NOS is cloth covered and is likely to dry out quicker than the alternative and become brittle. Besides, the rest of my replacement harness is plastic covered and no one will ever see this part. …he who judges shall get the f out and walk.
Two, I was concerned the plastic insulator part might also be brittle or become brittle more quickly than a newer piece.
Turns out there is no discernible difference between the original and the repop other than the plastic covered wire. Materials are otherwise identical and the insulator part that I thought was plastic turned out to be a rubber (or silicone) material.
Installation was a breeze. Rubbed a bit of grease on the jacket and it slid right into the column and the wheel went on without issue.
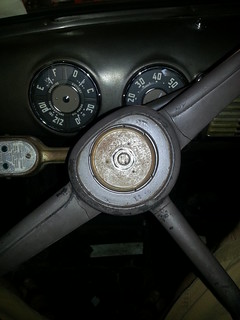
I had a ton of pictures of the reassembly process but the microSD card in my phone crapped out and I lost them all. Good news is, I drove the truck all week and messing with disassembling and reassembling the horn button has inspired me to get moving on restoring the original 6v noise maker.
.
About the new steering wheel… I ended up with three wheels from two different vendors (both in Missouri). The short story is that I ordered the black paintable wheel from a vendor in Kansas City, MO then found a pre-painted version for less from another vendor located in Independence, MO so I ordered that one too with the intention of returning the first one.
The black one was gorgeous! Perfectly smooth, super glossy, fit the mast splines well and the horn contact dropped right in. The painted one … horrible. Looked like the casting was trimmed by a 12yr old with a straight razor and the paint shot by a blind man in a dust storm, the splines didn’t line up well and the horn contact didn’t even come close to fitting. I called and they promptly sent another claiming the first one was a fluke. The second one was better. Not as nice as the black one but good enough that it looks good on the truck and clean up shouldn’t be much more than a bit of sanding and a repaint if I should ever become so anal retentive that it bothers me. The horn contact still had to be significantly reworked to fit.
I had several photos documenting the wheels, installation and a few of the cab with it installed but those too were lost when the SD card died.
.
Having nothing at all to do with the truck. Due to the tragic loss of so many amazing and most likely award winning photographs, I promptly went to the local “Shack” and purchased a brand spankin new 32gb SanDisk Ultra microSD card.
I leave you with a stunning picture of the aforementioned card. 🙂
4 Oct
Tank is in, everything is good …then the steering mast bearing takes a crap.
Took a bit of work to remove but I got it out and I’m waiting on a new one which should arrive by Monday.
I’m lucky the actual bearing assembly only broke loose from the mast jacket. It coulda separated and dumped all the ball bearings down the column into the steering box!
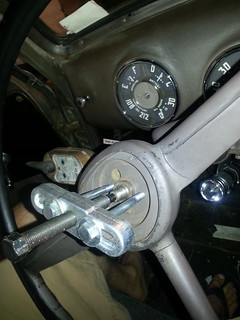

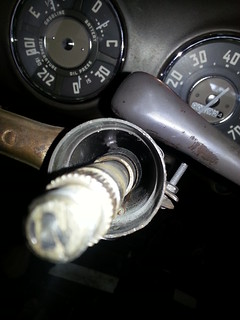
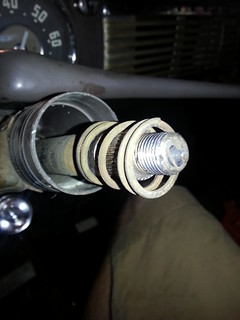
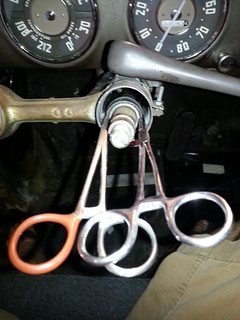
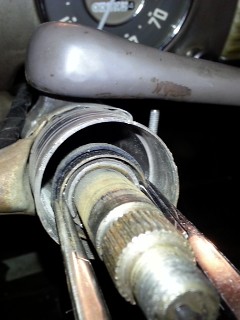
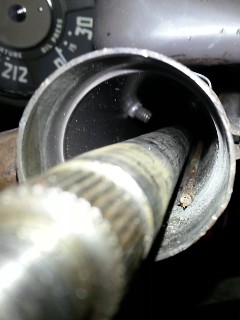
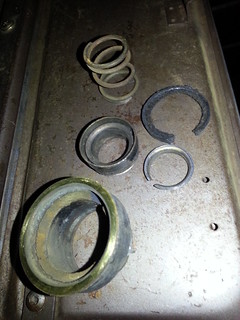
What I believe happened was that the material between the jacket and bearing assembly deteriorated and the tension of the spring pushed the bearing portion out of the jacket over time.
4 Aug
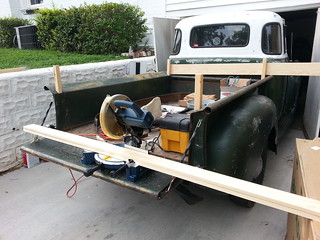
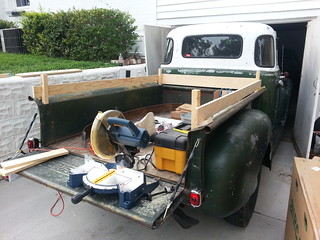
After returning a ton of stuff to the local big box hardware mega center with no receipt and ending up with a small fortune in store credit, I figured I’d buy what I needed to build the low stake sides I’d been thinking about adding.
Went with 1×4″ white pine for the sides and a 1×6″ for the front. At the rear above the gate I’ll be adding a single 1×6″ removable piece that attaches with cotter pins. All hardware will be stainless.
As the sun set I could see lightening to the west as a storm moved in so I was only able to get the posts, sides and front cut and drilled. …not too shabby for mocking it all up by sight and eye-balling all my cuts and holes.
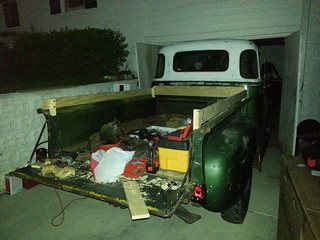
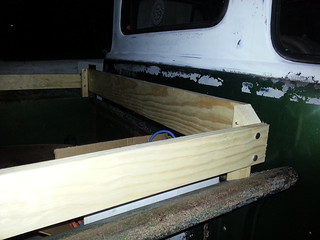
Better pictures to come…
The plan is to cut the final pieces then sand and start varnishing everything this week.
Since the rain blew in I figured I’d switch gears and work on the horn for a bit. Sounds great, just needs paint.
(Cool site on the Delco Remy Division of GM – http://www.delcoremyhistory.com/Products/horns.htm)
.
As for getting the ol’ girl running, I’m waiting on a dual action glass bowl fuel pump that is currently en route before pulling things apart. Currently she runs well enough to move her in and out of the garage and around the block. …I don’t dare go any further than that for fear of another tow.
9 Jul
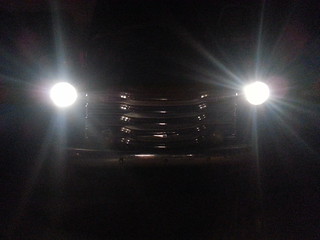
WOW! The new harness makes such a difference! No reason to switch to 12v for me. The 6v system works just as well when the contacts are all clean and tight. Lights all shine super bright, everything starts and runs fine, and best of all, NO MORE FIRE HAZARD!!!
It took us a little longer than expected, about two whole days hour-wise spread over three. A few broken bolts on the first day and some issues to troubleshoot by the third. All things considered, once we unhooked the turn signals due to a compatibility issue (5 wire vs 7), it went pretty smooth. The signals will eventually get set up separately.
OLD vs NEW

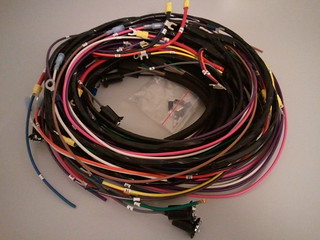
The new harness was a bit colorful for my taste so I finished it off by pairing and wrapping the lines as far down as I could with electrical tape. Time consuming but it makes it look a little less modern.
Other parts to be installed (didn’t get to everything)
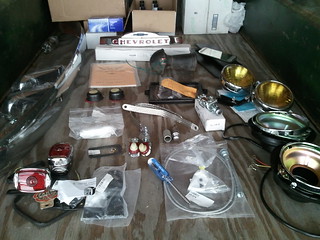
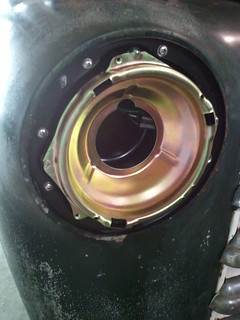
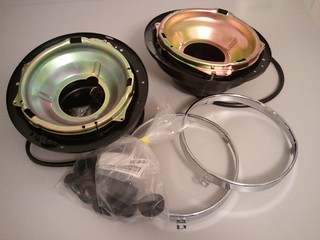
New buckets
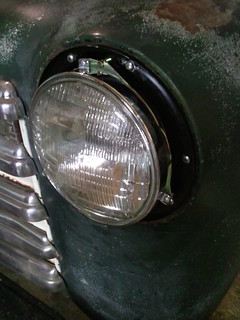
Bulbs installed
Bryan hooking up the starter
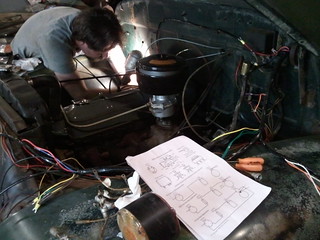
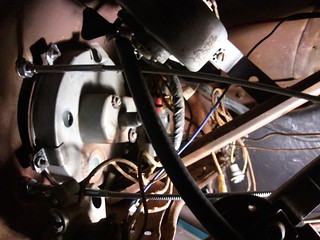
Hooking up the gauges and main lamp switch
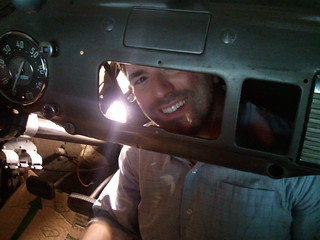
My view sitting behind the dash
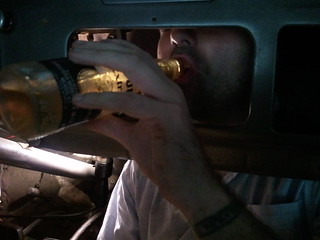
Staying hydrated behind the dash
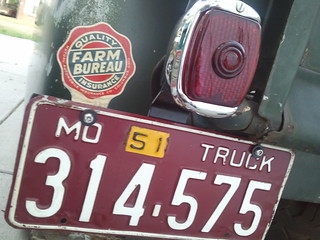
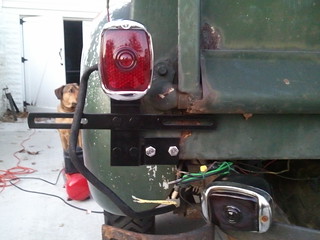
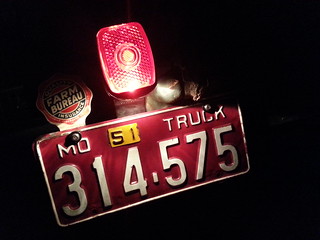
I ended up completely replacing the tail lamp assemblies and adding correct lamp brackets due to rust. As they came, the tail lights were dangerously dim and I noticed the glass lenses seemed much darker than the aftermarket plastic ones while shopping around. So, for safety reasons, I decided to go with new plastic lenses over reusing the original glass lenses. With the lenses, new harness and swap from two 6cp bulbs to a 6 and a 21cp bulb in each, they light up plenty clear even in bright daylight.
Old shot comparing the lenses.
30 Jun
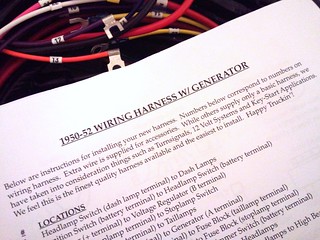
Finally got the harness! Ordered it on Monday got here on Wednesday. Realized it was the wrong one, called Wednesday evening and a new one was at my door by this (Friday) afternoon.
Classic Parts in KCMO is tops in my book! “Happy Truckin’!”
Got the buckets off ebay.
Also got these little guys from the ebay too. No more forgetting!

21 Jun
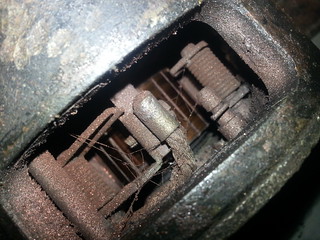
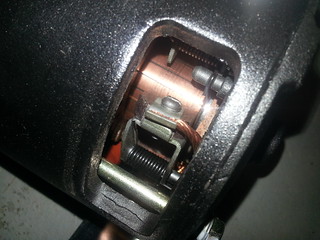
FINALLY GOT THE F’ING SWITCH!!!
Been waiting almost six weeks! Ended up cancelling the back order with Vendor #1 after they told me it’d be another week before they could tell me if it would be yet another week until it’d arrive at their warehouse. Finally found one available from another vendor (the last one in their stock) only to have the order held up by a back ordered ground strap I added on a whim to the final order with Vendor #2.
Now to order the harness. …wish me luck.
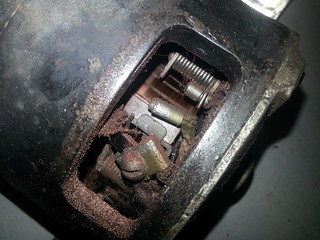
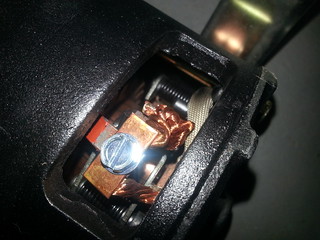
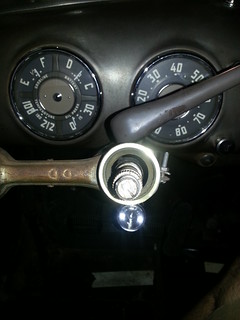
(Repop 6 volt headlamp switch, made like original)
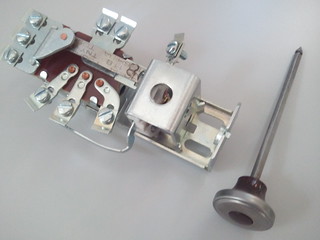
Made like the original… that metal tab with the printing on it in the photo above, that’s the circuit breaker. It’s a different type of metal that, when heated past a given point, bends, separating the copper contacts which opens the circuit and stops the flow of electricity. They make a repop with a fuse but I liked the original better since I will be running all additional accessories other than turn signals, thru an independent, non-original but period correct, fuse box rather than off the aux post on the switch.