
Hand signals – As of now, more than just a finger.
22 Sep
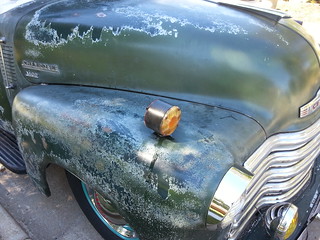
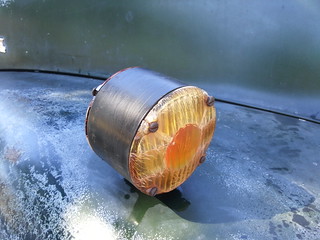
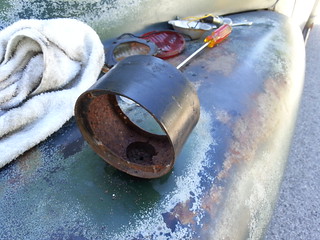
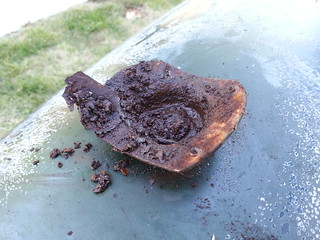
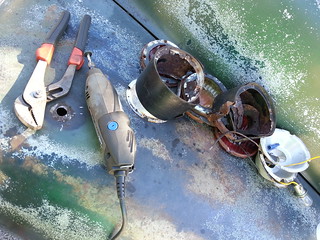
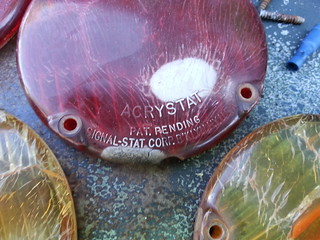
Finally removed the old fender mounted turn signals. Ended up having to cut em off. Man oh man, were they crusty.
22 Sep
Finally removed the old fender mounted turn signals. Ended up having to cut em off. Man oh man, were they crusty.
28 Aug
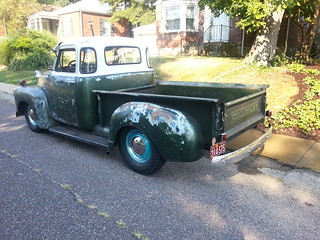
Had some free time on my hands so I cut out the last of the rusty bolts that were rattling around on the bed sides and cross sills, added some 2.25″ blocks (cut from 2×2″ scrap) under the front sill and finally mounted my rear bumper.
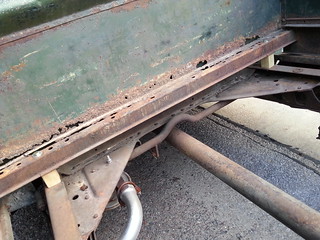
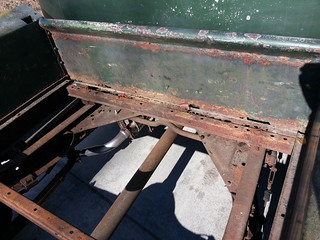
2 Feb
Got a warm winter weekend so I cut out the rotten sheet of plywood and the original bed strips in preparation for new wood and stainless strips this spring.
The original strips were so far gone that I just used bolt cutters on em and a small sledge to break up the wood.
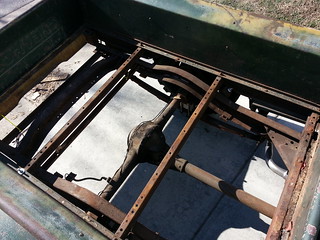
The bed front is shot too. Not sure yet if I’ll patch in the lower half or just replace the entire panel.
22 Aug
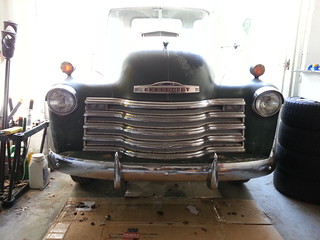
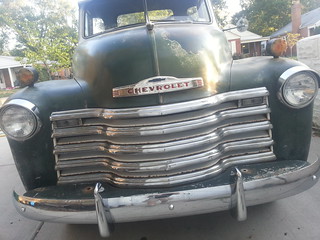
Got around to cutting the original bumper off yesterday and installed a better condition MBC stamped replacement along with a pair of stainless bumper guards. Started a while back when I took the hitch and rear bumper off but wasn’t able to get two of the bolts out of the front so I just left it loosely bolted on.
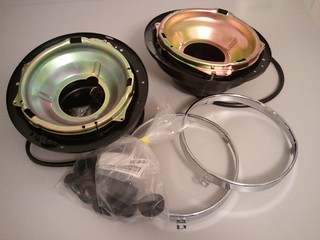
Also finally did the headlight bucket gaskets, stainless trim rings and seals, and stainless visors.
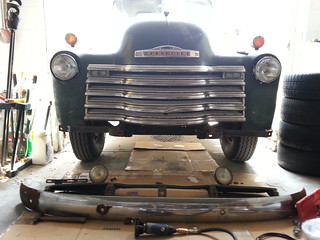

Turned out to be an original. The rear it came with and the replacements I picked up are all stamped with “MBC” (Michigan Bumper Company?)

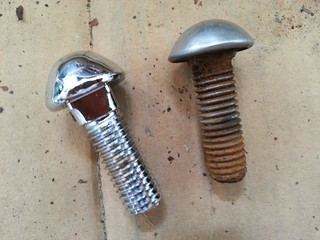
Difference in bolts. New fully stainless vs old stainless capped.
They’re not a perfect match and the original came with flat heads on the ends and domed for the center three. New are all domed but I like the larger shoulder.
Old fog lights. Surprisingly they came right off with a ratchet and a 19mm socket. The glass lenses had ‘Guide Tractor Light’ cast in them. Looks like they used to be red.
(pics to come)
Old fog light mounted as a back-up light.
(pics to come)
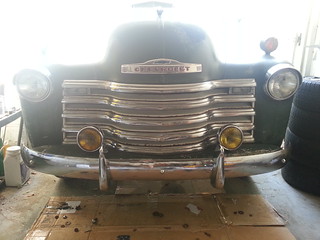
New Guide fog lights set in place. …still need to cut the bumper filler/splash apron so the brackets can pass through.
More pics…

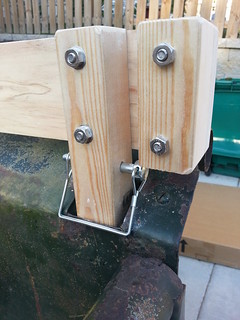
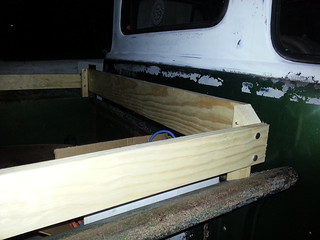
13 Aug
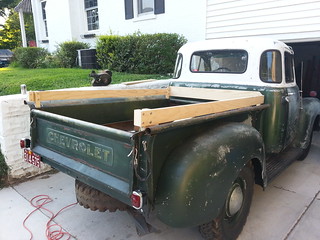
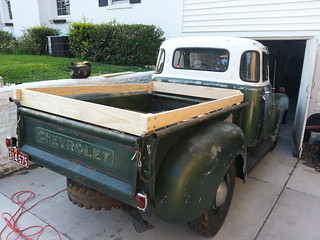
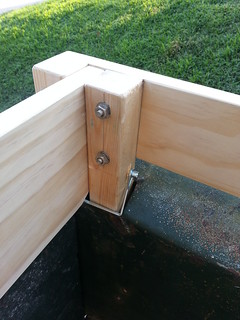
Got a little more cutting and sanding done on the stake sides over the weekend. Decided to add a removable board over the gate that slips in between the end pieces and is held in place with removable 1/4″ pins. …I’m pretty proud of the whole shebang. Came out pretty nice for eyeballing the entire thing.
Still needs a couple flat washers, lock washers all round, a bit more sanding and a few coats of varnish.

.
.
As far as the ol’ girl running goes, I have the pump. Just need to get around to checking all the lines and installing it.
Danger, Will Robinson! Danger!

4 Aug
After returning a ton of stuff to the local big box hardware mega center with no receipt and ending up with a small fortune in store credit, I figured I’d buy what I needed to build the low stake sides I’d been thinking about adding.
Went with 1×4″ white pine for the sides and a 1×6″ for the front. At the rear above the gate I’ll be adding a single 1×6″ removable piece that attaches with cotter pins. All hardware will be stainless.
As the sun set I could see lightening to the west as a storm moved in so I was only able to get the posts, sides and front cut and drilled. …not too shabby for mocking it all up by sight and eye-balling all my cuts and holes.
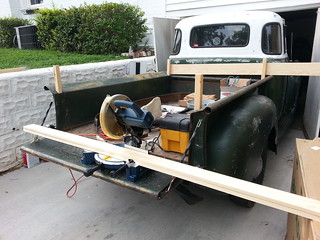
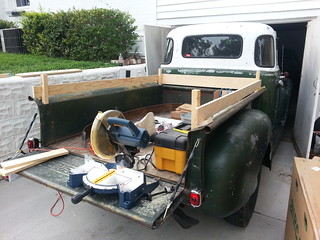
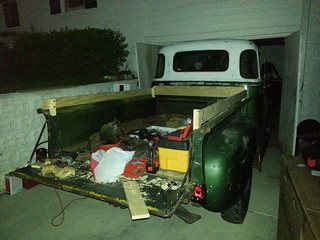
Better pictures to come…
The plan is to cut the final pieces then sand and start varnishing everything this week.
Since the rain blew in I figured I’d switch gears and work on the horn for a bit. Sounds great, just needs paint.
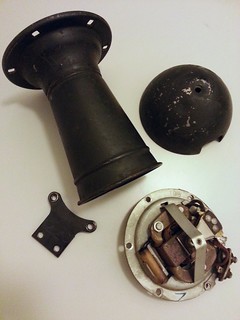
(Cool site on the Delco Remy Division of GM – http://www.delcoremyhistory.com/Products/horns.htm)
.
As for getting the ol’ girl running, I’m waiting on a dual action glass bowl fuel pump that is currently en route before pulling things apart. Currently she runs well enough to move her in and out of the garage and around the block. …I don’t dare go any further than that for fear of another tow.
29 Jul
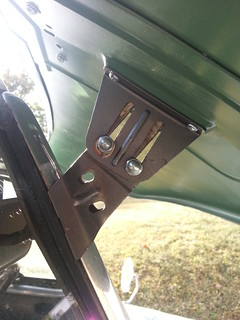
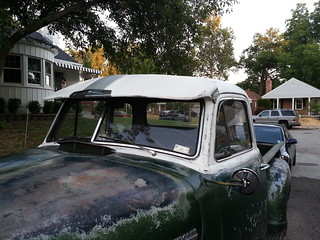
With the ol’ girl up and running sooner than I thought and the rest of the day now free, I finally got around to painting and installing a visor I picked up about a year ago. Not sure what brand it is but it’s a clamp-on type and adjustable in width. …I like it better than the typical Fulton visors you see everywhere.
As purchased.
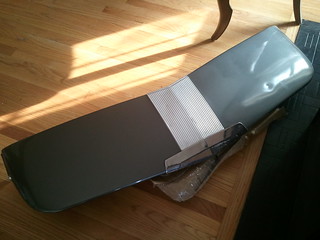
After paint.
Top side is shot in Satin White then weathered to match the top with fine grit paper, gravel, and dirt, and the under side is Moss Green. All hardware is replaced with stainless.
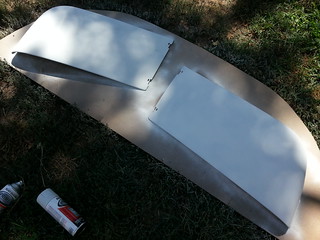
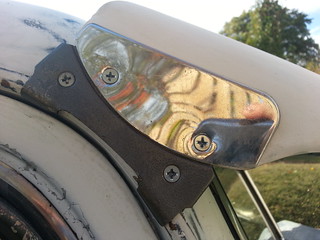
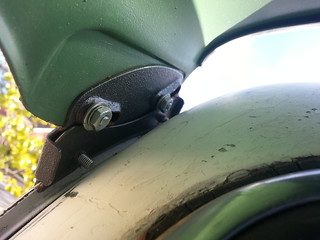
Installed the new stainless emblem too!
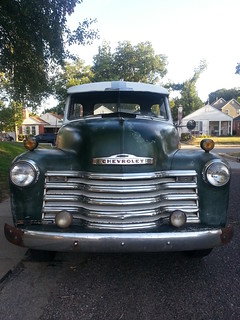
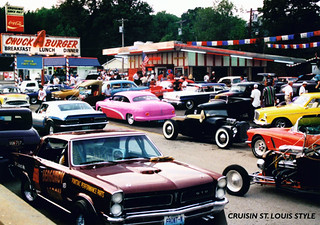
Got it on just in time to hit the Saturday night Chuck-A-Burger cruise! Pulled in with the paint on the underside still tacky.
26 Jul
New shift knob and stainless tailgate chains installed!
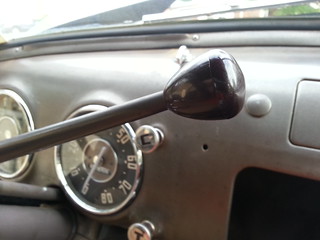
(Trick to installing the shift knob is to nuke it for 30sec. then smack it on w/a rubber mallet.)
22 Jul
Changed the oil, installed a new accelerator return spring and smacked the side mirror off backing into my garage. Wah wahhhh. Hopefully this isn’t the beginning of 7yrs bad luck.
A fellow stovebolter told me that “he don’t think so, since it’s a rear view mirror.” It just means I might of had some bad luck in the past that’s coming to an end. …Let’s hope so.
On the upside, I’m taking this opportunity to add the passenger side mirror and arm while I’m doing the driver side.
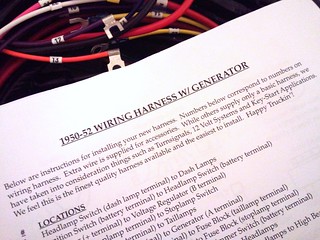
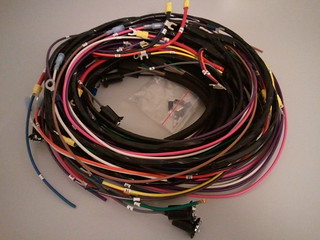
30 Jun
Finally got the harness! Ordered it on Monday got here on Wednesday. Realized it was the wrong one, called Wednesday evening and a new one was at my door by this (Friday) afternoon.
Classic Parts in KCMO is tops in my book! “Happy Truckin’!”
Got the buckets off ebay.
Also got these little guys from the ebay too. No more forgetting!
