Archive | Engine RSS feed for this section

Trading one leak for another is exhausting…

13 Oct

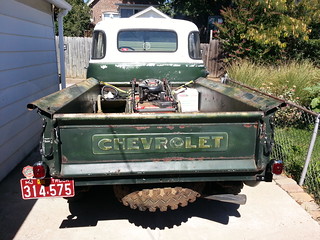
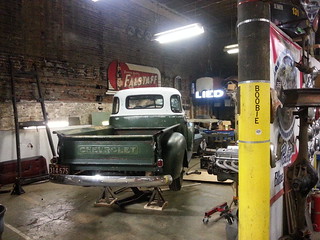
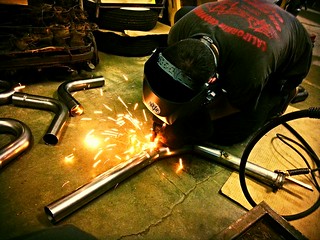
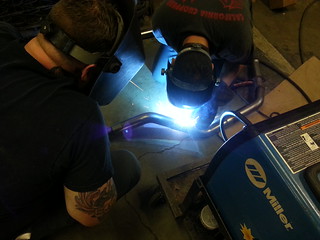
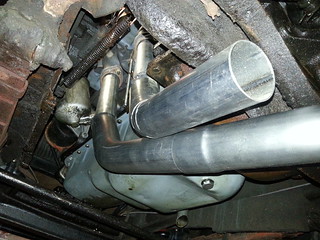
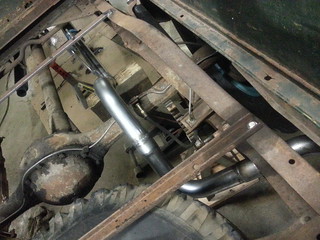
Got the dual exhaust put together and mounted. Fitting and welding went super smooth and turned out awesomer than awesome thanks to Dave from the H8Rcc (of which I am now officially a member). We ran the pipes all the way back, over the axle, between the leaf and frame, and turned them down inside the rear of the rear fenders. Totally stealth. Initially at idle it was loud but still sounded pretty good and engine braking gave me a fantastic Harley-esque burble and pop. Unfortunately, just cruising around it was WAY too loud and pretty much droned like I had a busted muffler the entire time. I partially attribute this to the fact that I have a 3OTT and 4.11 so it doesn’t wind up or down very quickly and partly to the fact that the 2.25″ I.D. pipe is totally overkill for a 216. Drove it around a couple nights and I couldn’t stand it. Acceleration sucked too. Kept stumbling and stalling…turns out I had a massive vacuum leak at the base of the carburetor as well.

So… How to fix the sound? Motorcycle baffles.

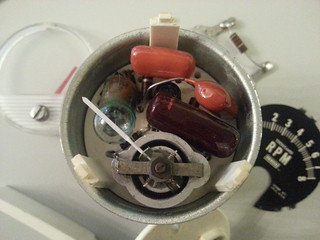
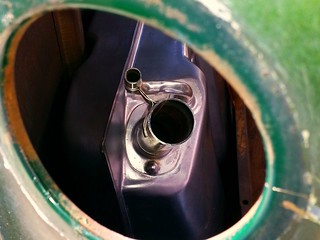
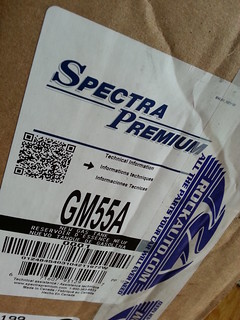
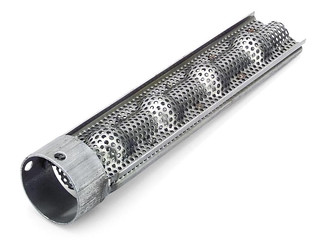
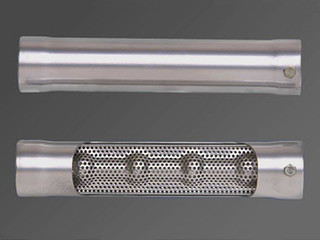
Seeing as I already had a big ass pair of 30″ fiberglass stuffed Smithy’s under the cab, I knew I didn’t want to add just another set of glass packs or resonators. I wanted tough, crisp and raspy with out being high pitched and my experience with a warmed over ’74 750 Honda with an open 4-1 megaphone got me thinking about tuning pipes and restriction/choke plates which in turn lead me to Khrome Werks, which is where I discovered their 2.25″ O.D. HP-Plus baffles for Harley drag pipes. After a quick conversation with their tech dept (they design/build everything they sell) I figured, based on the construction (see pics below), they’d be the best solution.
They were. First off, the tech gal was caught totally off guard when I told her what I was doing but she hung in there and offered educated discussion based on my description of the situation and assessment of the issue. Second, the baffles don’t look all that impressive (actually they look a bit gimmicky to be honest) but they are made to take the edge off a loud pipe and they do just that very well. I broke the pipe at the slip fits behind the Smithy’s and slid the baffles in. They were such a perfect fit that I simply flared the edge of the insert with a pair of channellocks and tapped them into place. The 2.25″ baffles are actually Khrome Werks’ 2″ baffles enclosed in a tube which is bumped out to 2.25 O.D. at the ends, I think this 1/4″ choke helps a bit too. Once I had her fired up I could immediately tell that the baffles took everything way down sound-wise but left just enough of the 6cyl crackle. Should get better as the as the glass packs burn out too. In my opinion, it sounds better (less raspy and much less high pitched) than my buddy’s Fleetline with a 235 and long 1.75″ straight pipes.

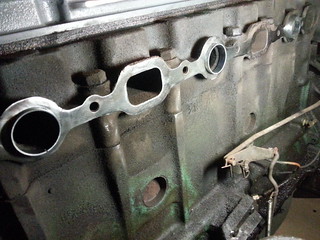
Time to move on to the vac leak which I solved by cleaning up the intake/carb surface and using a thicker gasket. Now sealed and retuned, she sings perfect idling at 650-750rpm and cleanly revs up to 1500 with no stumble.

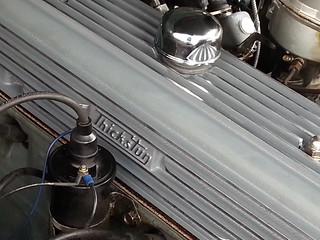
…this is when I noticed oil pissing out the copper line that weaves through the block and feeds the rocker shaft. FML.

20131012_143940

20131012_114830

IMG_20131013_084206

20131012_161644

20131012_154827

20131013_115043

.

Khrome Werks 2.25″ HP Plus baffle.

KhromeWerksInterior

KhromeWerks3_4thsInterior

KhromeWerks2.25inDia

.

H8R

20131016_201718

If stickers add +/-5whp each…

4 Oct

…this bad boy has gotta be worth 45-50 easy! That’s mirror polished folks.

20131004_155816
.

Progress:

20130924_122540

20131003_221333

Fun Stuff Pt.7

24 Sep

The other day I was laying on the sofa sipping my post-op milkshake (periodontal surgery), half-assedly watching Last of the Mohicans and thinking about how my birthday is coming up. While drifting in and out of a hazy pill induced slumber I thought to myself… I work hard dammit! I deserve something nice! Suddenly, fully alert, I hopped on everyone’s favorite auction site and purchased an NOS cast aluminum Thickstun valve cover I’d been watching for the past week.

20130924_123054

Fast forward a few days…
Headed out to install the raw aluminum cover, get everything pulled apart and I think to myself, “Gee, this is gonna be a bitch to clean when it gets all grimy and starts oxidizing. I should probably paint it.” So, I head back in.

The day wasn’t a total loss. Managed to install the Brake Release handle grommet.

20130924_172635

Vroom vroom braaaaap bap bap baap!!

17 Sep

2.25″ pipe kit and two 30″ Smithy’s glass packs. Goin’ for a deeper more mellow sound without losing the classic straight six rap. 8)

20130917_175424

IMG_0009

Rap them pipes!

17 Jul

Finally picked up my split stock manifold from the welder’s shop! Not as pretty as I wanted but nothing a little grinding and coating won’t hide.

20130717_222655.jpg

Shot the intake and brushed a quick coat of POR-15 Manifold paint on so it doesn’t rust while I’m waiting on the rest of the exhaust.

20130810_183314

20130810_184033

20130811_010052

Tach.

22 Jun

Scored an old three wire DixCo tachometer on the ’47-55 AD Tech and Swap Meet fb page. Works great! Took it apart to clean it up and change the bulb color from green to white/clear.

20130618_192034.jpg

20130622_151410.jpg

Aviary_2013_07_30_11_23_11_upload

Tanked.

22 Sep

It’s the best time of year. A beautiful morning in late September. Just a little bit too cool to wear a hoodie and shorts. A perfect day to turn wrenches out in the driveway. So, with coffee in hand, the early morning sun poking through the leaves of the tall trees and Mr. Brown happily depositing steaming piles of meals past on the dew covered grass, I roll the the combination back on the pad lock and retrieve my tools from the cold concrete cave that is my crappy little garage. I’m preparing supplies and listening to the birds as I eagerly await the arrival of my good friend and second pair of hands. Suddenly, my phone ignites in a frenzy of buzzing and beeping! It’s Greg, “Forgot I have to do something, I’ll be there at 10a.” He texts. “K. Cool.” I reply. Drats. Guess I’ll get started. I pull the seat and frame then dig out what I need to sever the fuel line and slide under ol’ Bessie. After assessing her undercarriage for a bit I clamp off the soft line before the fuel filter using an old rusty pair of vice-grips. Expecting a furious flow of fuel from the nearly full 17gal tank above, I prepare a 6gal gas can with a funnel and slowly remove the filter. Wincing as I loosen the the vice-grips. Nothing. I let it drain for an hour and I might have had an inch in the bottom of the can.

[flickr video=8015779513 secret=f2aa180302 w=400 h=225]

.

Greg made it over a bit sooner than expected and after poking around with a coat hanger I decided to siphon it from the top. Not smart. Filled the 6gal can quick but the vapor from the lead additive almost made me vomit. While I was gagging I remembered that the new tank came with a 1/4″ plug in its outlet. So we plugged the flow on the old tank, unhooked the filler neck, removed the straps and lifted it from its saddles. Once the tank was out I noticed a large drain plug at one of the corners and we had it emptied in a matter of minutes.

Those old steel Toyota wheels I’ve been kicking around since 2004 finally came in handy. Two made a perfect stand for a tank weighing about 80lbs and one made a great fulcrum for emptying.

20120922_111749.jpg

20120922_104425.jpg

Shortly after draining the tank, stovebolt.com member Olblue3600 stopped by to say hi. Unfortunately he was fighting fuel troubles of his own so he couldn’t bring his 3/4 ton.

Now back to the cab…

20120922_111710.jpg

After a quick vacuum and wipe down with the new tank installed.

20120922_135600.jpg

Artsy shot through the filler hole.

20120922_132923_2.jpg

Filler neck attached.

20120922_135612.jpg

Underside with tank and new line installed.

20120922_152435.jpg

New lines and pump in place.

20120923_132018.jpg

Temporary seat.

20120922_162332.jpg

With the temporary seat in place, everything connected and 5gals of fresh fuel poured in, it was time to fire her up. After a chug or two she started right up and started leaking just as fast. Apparently the top and bottom halves of the fuel portion of the pump weren’t quite tight enough. Once tightened, I dialed in the carburetor and took her out for a spin by way of a gas station.

20120923_190356.jpg

FINALLY! I made it further than a mile from home!!! Now to load up the mower and head to the girlfriends place.

20120923_111415.jpg

20120923_132250.jpg

20120923_132308.jpg

20120923_132747.jpg

F the haystack, the needle has been found!

21 Sep

After scouring the town for a brass 1/4″ FNPT to 3/8″ hose barb I finally had all the parts assembled to replace Bessie’s entire fuel system; Ni-Terne tank from Spectra, stainless lines from Inline Tube via American Classic Truck Parts, dual action glass bowl fuel pump from Chevs of the ’40s, the rebuilt Leakchester (yes, it’s already leaking) carburetor and base insulator that I installed earlier in the year from an old timer I know who builds em in his basement and 19gal worth of empty fuel cans on loan from friends.

About the almost fruitless hunt for the hose barb…
I decided to go with brass barbs and a section of hose instead of the available tank to line flex hose for a few reasons. One, it’s cheaper and I’ll have to cut it for the filter. Two, I waited till last minute to get the same part at NAPA that I coulda picked up through American Classic for less when I ordered the lines and tank pads. (*smacks forehead*) Still had a four day wait from NAPA … not gonna be in till Thursday. Not gonna work. So, at 1p this afternoon (Friday) the search began for a 1/4″ FNPT to 3/8″ barb. After four and a half hours of driving all over town and running into every big box and mom and pop hardware store, auto parts store and plumbing supply store with a +6′ long pre-bent, fitted and flared section of stainless hose, I headed back towards NAPA with little hope. Of course, my guys came through for me … “Brass is brass, look in the air tool section.” Joe says. Sure enough, there it is. Grabbed it and its infinitely more common counterpart, the 1/4″ MNPT to 3/8″ hose barb for the tank, a section of gas-o-hol safe hose and a clear fuel filter and headed home just in time for date night with my girlfriend.
Mmm… Indian food and patio drinks on a beautifully tepid clear summer evening.

Juicebox.

4 Sep

20120901_152914.jpg

Decided to go with a new tank over boiling and relining the old one for two reasons. One, from what I’ve read relining only lasts so long before it dissolves, allowing the tank to rust again, or it turns to gum and clogs everything. Two, I found the Spectra brand Ni-Tern (nickel/tin plated) tank for less than $150 shipped at RockAuto. No brainer. My time spent preforming the relining process is worth more than the difference in price.

The people at both rockauto.com and Spectra were more than helpful and remained totally friendly when I asked my usual way too many questions.

Towed again.

30 Aug

On Tuesday I pulled Bessie out of the garage and replaced the fuel filter, which was full of red sand, blew out the lines and decided not to replace the pump until I dealt with the rust in the tank. Worst case, I clog another cheap filter. In lieu, I opened up the old fuel pump and cleaned it out best I could without completely disassembling it. Flow looked good everywhere so I put it back together.

Two days later I went for a drive…

20120830_202635.jpg

Got a little further than a mile from the house this time. As I was nearing the top of a long hill and downshifting into second she started bucking and sputtering. Dead. Luckily there was an open used car lot to my left and no oncoming traffic so I was able to coast in and park it next to a vintage Ford firetruck. The owners were good people, said I could leave it there as long as I needed. Even luckilyer, a good friend of mine who also happens to be the dispatcher for my towing company of choice was sitting in a window seat at Steak n’ Shake directly across the street. He called it in as soon as he saw me put the hood up. It gets better. He said the driver exclaimed, “I know the truck and where it’s going, just tell me where it’s at!” when the on duty dispatcher said “Green, white and rust 1951 Chevy picku…”

20120830_204748.jpg

Plug for Bolin towing – www.bolinservicesincorporated.com – every driver (I think I know most of them at this point) has been awesome.