Archive | Interior RSS feed for this section

From SLAM to kerthunk.

20 Sep

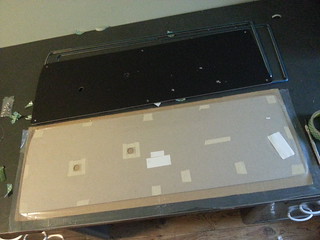
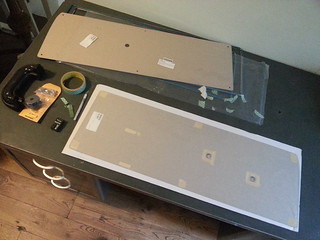
It’s amazing what all a door panel can do. While improving looks it also manages to silence 99.9% of the rattling the door internals do. I added heavy plastic, cut from the bags the frames came in, to the backside to keep any leakage off the cardboard.

20130920_133051_1

20130920_124251

Also installed new door handles and arm rests while I was at it.

She’s packin’ heat …or will be soon.

21 Feb

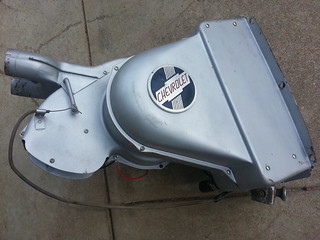
Picked this up the other day…

20130220_164324.jpg

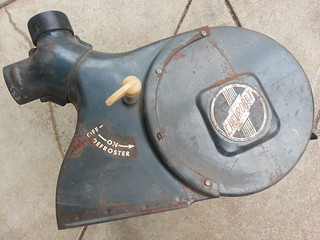
…to replace this.

20130220_162043.jpg

I’m actually planning on restoring both. Since the recirculated heater is in great condition and original to the truck it’ll end up as garage art and the fresh air heater will end up in Bessie.

.

.

Artsy shot.

chevHeater

Mast bearing replacement

13 Oct

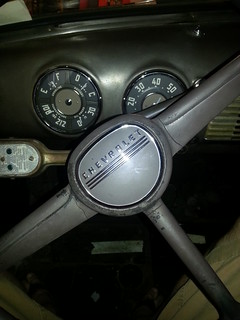
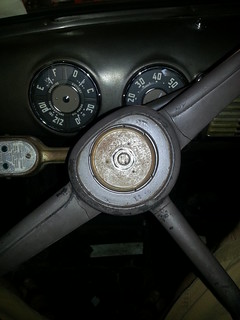
Got the new mast bearing and steering wheel on Monday and installed it all on Tuesday. Went with the repopped version over NOS for a couple reasons…
One, the wire. NOS is cloth covered and is likely to dry out quicker than the alternative and become brittle. Besides, the rest of my replacement harness is plastic covered and no one will ever see this part. …he who judges shall get the f out and walk.
Two, I was concerned the plastic insulator part might also be brittle or become brittle more quickly than a newer piece.

Turns out there is no discernible difference between the original and the repop other than the plastic covered wire. Materials are otherwise identical and the insulator part that I thought was plastic turned out to be a rubber (or silicone) material.

Installation was a breeze. Rubbed a bit of grease on the jacket and it slid right into the column and the wheel went on without issue.

I had a ton of pictures of the reassembly process but the microSD card in my phone crapped out and I lost them all. Good news is, I drove the truck all week and messing with disassembling and reassembling the horn button has inspired me to get moving on restoring the original 6v noise maker.

.

About the new steering wheel… I ended up with three wheels from two different vendors (both in Missouri). The short story is that I ordered the black paintable wheel from a vendor in Kansas City, MO then found a pre-painted version for less from another vendor located in Independence, MO so I ordered that one too with the intention of returning the first one.

The black one was gorgeous! Perfectly smooth, super glossy, fit the mast splines well and the horn contact dropped right in. The painted one … horrible. Looked like the casting was trimmed by a 12yr old with a straight razor and the paint shot by a blind man in a dust storm, the splines didn’t line up well and the horn contact didn’t even come close to fitting. I called and they promptly sent another claiming the first one was a fluke. The second one was better. Not as nice as the black one but good enough that it looks good on the truck and clean up shouldn’t be much more than a bit of sanding and a repaint if I should ever become so anal retentive that it bothers me. The horn contact still had to be significantly reworked to fit.

I had several photos documenting the wheels, installation and a few of the cab with it installed but those too were lost when the SD card died.

.

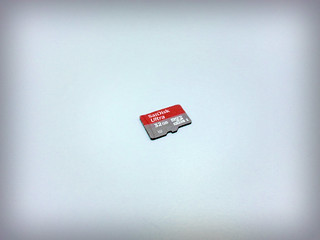
Having nothing at all to do with the truck. Due to the tragic loss of so many amazing and most likely award winning photographs, I promptly went to the local “Shack” and purchased a brand spankin new 32gb SanDisk Ultra microSD card.

I leave you with a stunning picture of the aforementioned card.  🙂
sanDiskMicroSD

Mastbearingectomy.

4 Oct

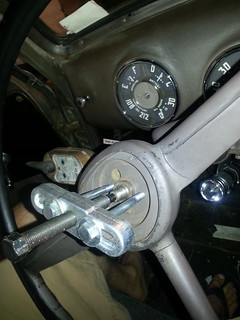
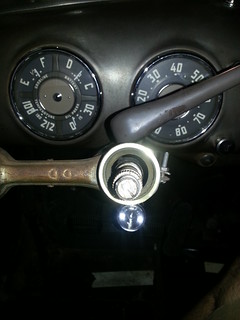
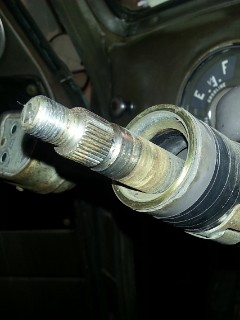
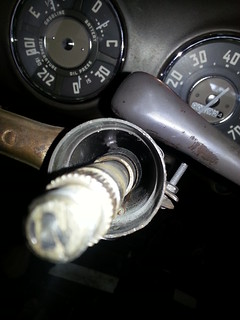
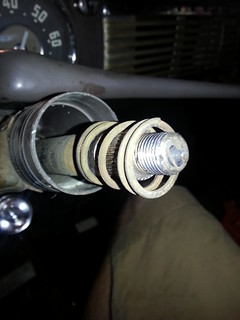
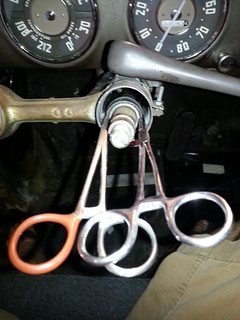
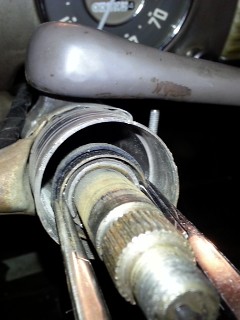
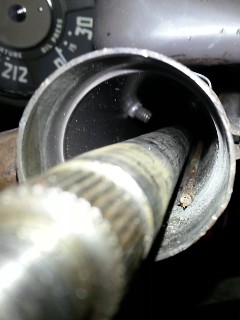
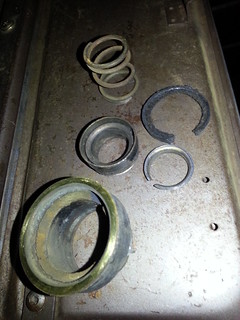
Tank is in, everything is good …then the steering mast bearing takes a crap.

Took a bit of work to remove but I got it out and I’m waiting on a new one which should arrive by Monday.

I’m lucky the actual bearing assembly only broke loose from the mast jacket. It coulda separated and dumped all the ball bearings down the column into the steering box!

20121004_170115.jpg

20121004_170136.jpg

20121004_170651.jpg

20121004_170836.jpg

20121004_170858_2.jpg

20121004_172353.jpg

20121004_172746.jpg

20121004_174037.jpg

20121004_174046_2.jpg

20121004_174554_2.jpg

20121004_174506.jpg

What I believe happened was that the material between the jacket and bearing assembly deteriorated and the tension of the spring pushed the bearing portion out of the jacket over time.

Knob and Chains

26 Jul

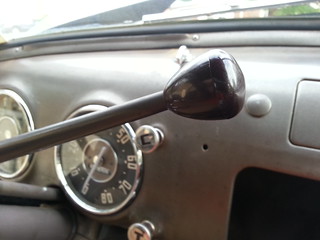
New shift knob and stainless tailgate chains installed!

20120721_184623.jpg

(Trick to installing the shift knob is to nuke it for 30sec. then smack it on w/a rubber mallet.)

Gremlin hunting. …cont’d. …again.

21 Jun

FINALLY GOT THE F’ING SWITCH!!!
Been waiting almost six weeks! Ended up cancelling the back order with Vendor #1 after they told me it’d be another week before they could tell me if it would be yet another week until it’d arrive at their warehouse. Finally found one available from another vendor (the last one in their stock) only to have the order held up by a back ordered ground strap I added on a whim to the final order with Vendor #2.

Now to order the harness. …wish me luck.

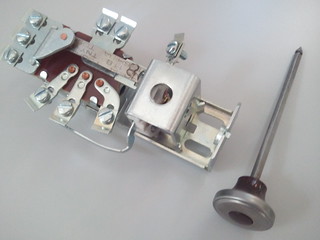
(Repop 6 volt headlamp switch, made like original)
2012-06-20 15.37.54.jpg

Made like the original… that metal tab with the printing on it in the photo above, that’s the circuit breaker. It’s a different type of metal that, when heated past a given point, bends, separating the copper contacts which opens the circuit and stops the flow of electricity. They make a repop with a fuse but I liked the original better since I will be running all additional accessories other than turn signals, thru an independent, non-original but period correct, fuse box rather than off the aux post on the switch.

Gremlin hunting. …cont’d.

5 Jun

Finally received the parts to complete the combination meter along with some other odds and ends.
Still waiting on the backordered headlamp switch though … if it takes long enough, I’ll go ahead and order a new harness and period correct fuse block to run accessories through and just get it all done at once.

2012-06-05 12.34.10.jpg

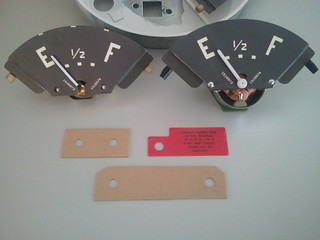
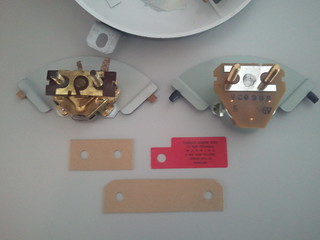
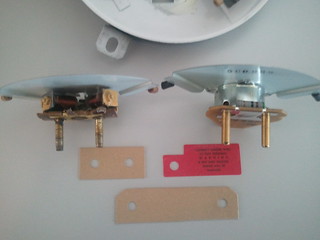
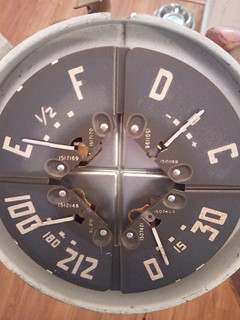
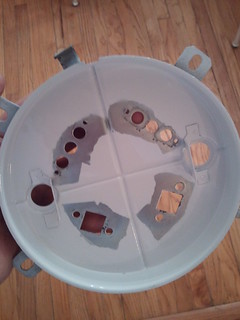
For a long while now the fuel gauge has intermittently worked. …more often not, but when it was working it was never all that accurate. At some point after disassembling the combination meter I noticed one of the posts on the back of the gauge was loose. Turns out its simply a knurled section of the post that presses through the fiber board on the back side of the gauge and the board had deteriorated around it. Unfortunately this fitting also holds the completed connection between the post and the gauge innards together. Although I was able to repair it by making a permanent connection with a dab of solder I chose to order a replacement gauge. When I received the replacement fuel gauge I immediately noticed that it didn’t match the decals I used to reface the rest of the gauges. So, I ended up having to order another decal sheet.

There are a lot of differences between the original and new gauges. The most annoying is that the new one is a smidge taller causing the trim plate to press against the needle. This was remedied by gently grinding out the edge making contact with the needle and slightly bending the center portion of the trim plate outward to clear the needle base.

After refacing. Insulators, warning tag and gauge comparison. (Old on the left, new on the right.)
2012-06-05 10.15.12.jpg

2012-06-05 10.16.21.jpg

2012-06-05 10.16.46.jpg

Back of combination meter.
2012-06-05 11.34.45.jpg

Detail of new warning tag.
Flickr_2012_06_05_10_19_22.jpg

Reassembled combination meter.
2012-06-05 11.33.50.jpg

Side note: My kitchen counter tops make an awesome neutral gray background. 8)

Gremlin hunting.

26 May

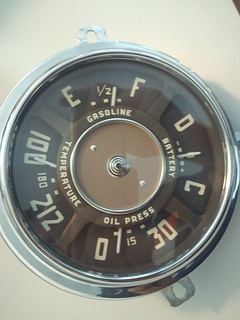
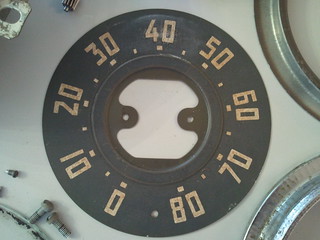
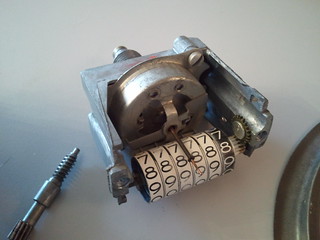
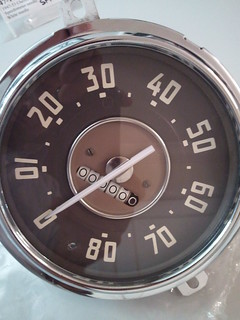
What started as simply chasing down that electrical short turned into gutting the dash of superfluous wiring then replacing the main lamp switch and pulling, rebuilding, and refacing the gauges and reseting and refacing the odometer.

Speedometer:
Flickr_2012_05_25_05_57_48.jpg

Flickr_2012_05_25_05_58_58.jpg

Untitled

Flickr_2012_05_25_05_58_09.jpg

Not completely happy with the new odometer decals but watcha gonna do…
Flickr_2012_05_25_06_21_03.jpg

Flickr_2012_05_26_12_10_31.jpg

Combination meter:
Flickr_2012_05_25_08_20_10.jpg

Flickr_2012_05_25_08_54_54.jpg

Flickr_2012_05_25_08_30_24.jpg

Flickr_2012_05_25_09_24_01.jpg

I’ve repainted the needles and refaced the individual parts of the combination meter but its late and I’m waiting on some parts to arrive before reassembling and snapping pics.

Gauge glass …flat, rough cut glass. Not tempered or laminated. Cut you to ribbons type glass.
Flickr_2012_05_25_09_03_12.jpg

Swampass BEGONE!

20 Mar

Been driving her everywhere for the past few days. Got a new seat in today. Its been reupholstered with a burlap weave flannel type material over nice dense foam. Its 1000 times better than the old nasty heavy vinyl cover over dead springs and broken down batting. No more ass/back sweat!

I’m doing the armrests and visors in black vinyl and the door halves and headliner in an old steer hide I have as a rug in my living room.

Fun stuff! (Pt. Fer)

29 Feb

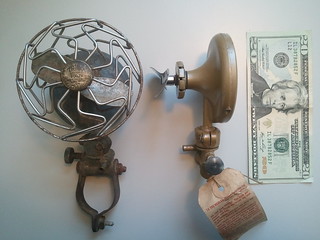
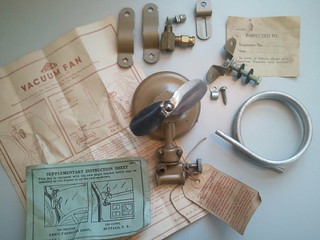
Thinking ahead, summer is around the corner … So I picked up 1940-50’s Trico vacuum powered, twin blade, column mounted defog/cooling fan. …and another for a NOS Trico fan thats missing its cage.

Come spring, with all the parts I have sitting around, this truck is gonna get decked the f out!

Trico vacuum fans

NOS Trico vacuum fan

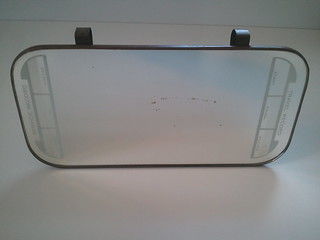
Also got a NOS Service Record/Travel Log clip on mirror.

Untitled

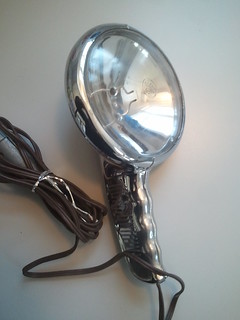
And found, in a box of stuff in the spare room, a 6v spotlight given to me by my former father in-law. Turns out this exact type (mine is sans the GM stamp on the handle) was offered as an accessory by dealers in the 50’s.

Untitled

Its fun collecting period correct accessories but I gotta get the damn thing running and lowered asap.