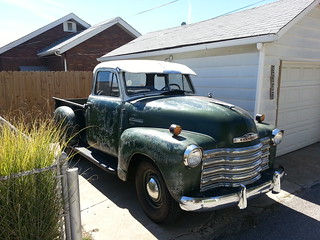
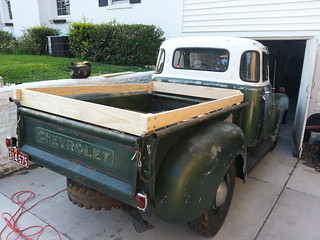
Mast bearing replacement

13 Oct

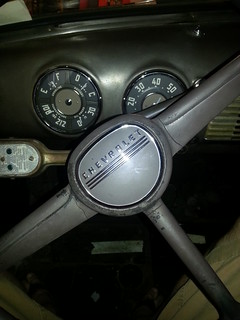
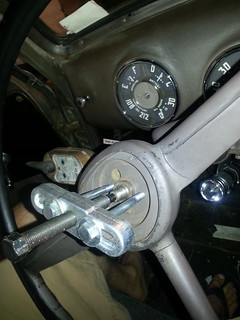
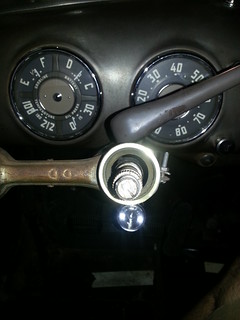
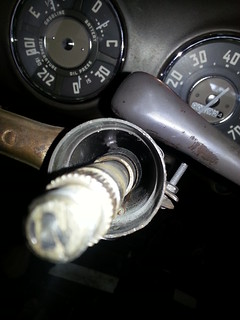
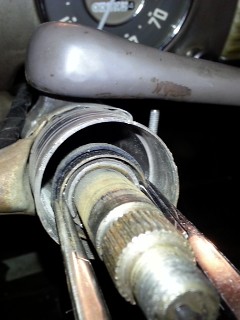
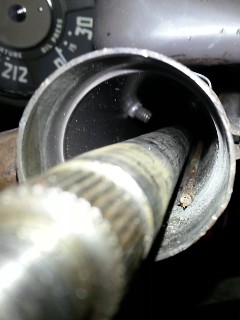
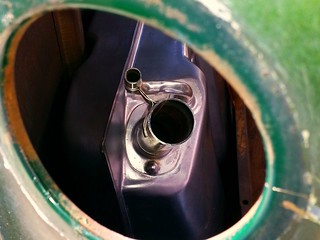
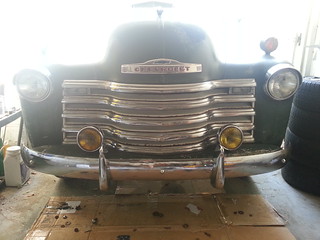
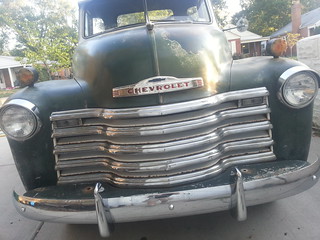
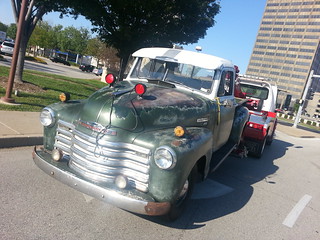
Got the new mast bearing and steering wheel on Monday and installed it all on Tuesday. Went with the repopped version over NOS for a couple reasons…
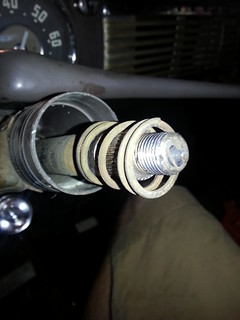
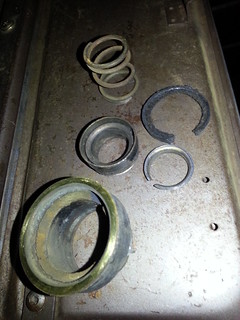
One, the wire. NOS is cloth covered and is likely to dry out quicker than the alternative and become brittle. Besides, the rest of my replacement harness is plastic covered and no one will ever see this part. …he who judges shall get the f out and walk.
Two, I was concerned the plastic insulator part might also be brittle or become brittle more quickly than a newer piece.

Turns out there is no discernible difference between the original and the repop other than the plastic covered wire. Materials are otherwise identical and the insulator part that I thought was plastic turned out to be a rubber (or silicone) material.

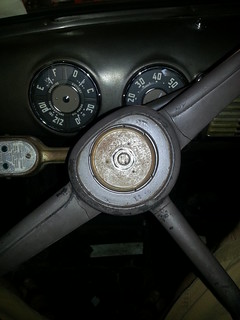
Installation was a breeze. Rubbed a bit of grease on the jacket and it slid right into the column and the wheel went on without issue.

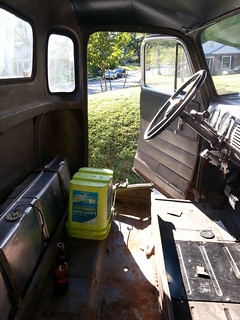
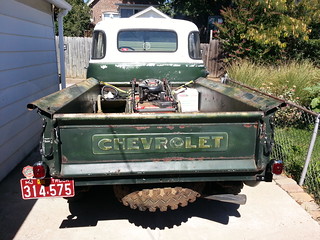
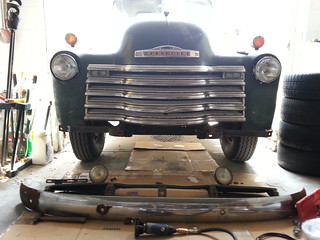
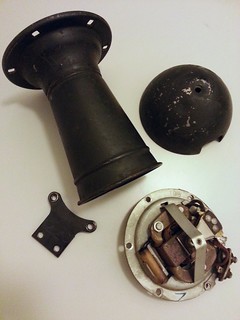
I had a ton of pictures of the reassembly process but the microSD card in my phone crapped out and I lost them all. Good news is, I drove the truck all week and messing with disassembling and reassembling the horn button has inspired me to get moving on restoring the original 6v noise maker.

.

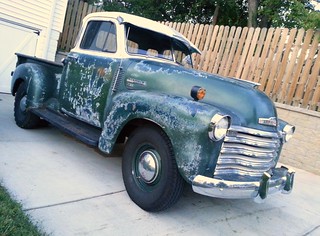
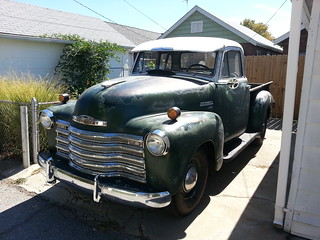
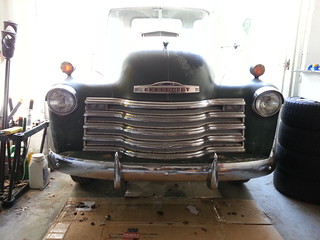
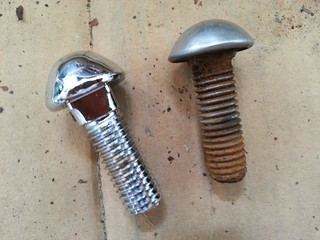
About the new steering wheel… I ended up with three wheels from two different vendors (both in Missouri). The short story is that I ordered the black paintable wheel from a vendor in Kansas City, MO then found a pre-painted version for less from another vendor located in Independence, MO so I ordered that one too with the intention of returning the first one.

The black one was gorgeous! Perfectly smooth, super glossy, fit the mast splines well and the horn contact dropped right in. The painted one … horrible. Looked like the casting was trimmed by a 12yr old with a straight razor and the paint shot by a blind man in a dust storm, the splines didn’t line up well and the horn contact didn’t even come close to fitting. I called and they promptly sent another claiming the first one was a fluke. The second one was better. Not as nice as the black one but good enough that it looks good on the truck and clean up shouldn’t be much more than a bit of sanding and a repaint if I should ever become so anal retentive that it bothers me. The horn contact still had to be significantly reworked to fit.

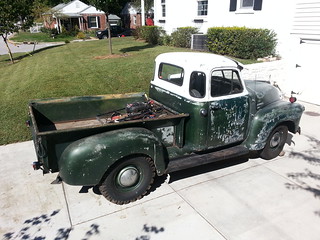
I had several photos documenting the wheels, installation and a few of the cab with it installed but those too were lost when the SD card died.

.

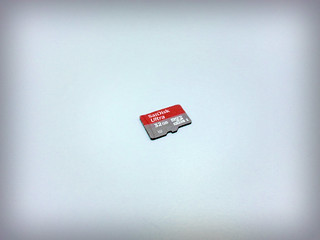
Having nothing at all to do with the truck. Due to the tragic loss of so many amazing and most likely award winning photographs, I promptly went to the local “Shack” and purchased a brand spankin new 32gb SanDisk Ultra microSD card.

I leave you with a stunning picture of the aforementioned card.  🙂

sanDiskMicroSD

Mastbearingectomy.

4 Oct

Tank is in, everything is good …then the steering mast bearing takes a crap.

Took a bit of work to remove but I got it out and I’m waiting on a new one which should arrive by Monday.

I’m lucky the actual bearing assembly only broke loose from the mast jacket. It coulda separated and dumped all the ball bearings down the column into the steering box!

20121004_170115.jpg

20121004_170136.jpg

20121004_170651.jpg

20121004_170836.jpg

20121004_170858_2.jpg

20121004_172353.jpg

20121004_172746.jpg

20121004_174037.jpg

20121004_174046_2.jpg

20121004_174554_2.jpg

20121004_174506.jpg

What I believe happened was that the material between the jacket and bearing assembly deteriorated and the tension of the spring pushed the bearing portion out of the jacket over time.

Tanked.

22 Sep

It’s the best time of year. A beautiful morning in late September. Just a little bit too cool to wear a hoodie and shorts. A perfect day to turn wrenches out in the driveway. So, with coffee in hand, the early morning sun poking through the leaves of the tall trees and Mr. Brown happily depositing steaming piles of meals past on the dew covered grass, I roll the the combination back on the pad lock and retrieve my tools from the cold concrete cave that is my crappy little garage. I’m preparing supplies and listening to the birds as I eagerly await the arrival of my good friend and second pair of hands. Suddenly, my phone ignites in a frenzy of buzzing and beeping! It’s Greg, “Forgot I have to do something, I’ll be there at 10a.” He texts. “K. Cool.” I reply. Drats. Guess I’ll get started. I pull the seat and frame then dig out what I need to sever the fuel line and slide under ol’ Bessie. After assessing her undercarriage for a bit I clamp off the soft line before the fuel filter using an old rusty pair of vice-grips. Expecting a furious flow of fuel from the nearly full 17gal tank above, I prepare a 6gal gas can with a funnel and slowly remove the filter. Wincing as I loosen the the vice-grips. Nothing. I let it drain for an hour and I might have had an inch in the bottom of the can.

[flickr video=8015779513 secret=f2aa180302 w=400 h=225]

.

Greg made it over a bit sooner than expected and after poking around with a coat hanger I decided to siphon it from the top. Not smart. Filled the 6gal can quick but the vapor from the lead additive almost made me vomit. While I was gagging I remembered that the new tank came with a 1/4″ plug in its outlet. So we plugged the flow on the old tank, unhooked the filler neck, removed the straps and lifted it from its saddles. Once the tank was out I noticed a large drain plug at one of the corners and we had it emptied in a matter of minutes.

Those old steel Toyota wheels I’ve been kicking around since 2004 finally came in handy. Two made a perfect stand for a tank weighing about 80lbs and one made a great fulcrum for emptying.

20120922_111749.jpg

20120922_104425.jpg

Shortly after draining the tank, stovebolt.com member Olblue3600 stopped by to say hi. Unfortunately he was fighting fuel troubles of his own so he couldn’t bring his 3/4 ton.

Now back to the cab…

20120922_111710.jpg

After a quick vacuum and wipe down with the new tank installed.

20120922_135600.jpg

Artsy shot through the filler hole.

20120922_132923_2.jpg

Filler neck attached.

20120922_135612.jpg

Underside with tank and new line installed.

20120922_152435.jpg

New lines and pump in place.

20120923_132018.jpg

Temporary seat.

20120922_162332.jpg

With the temporary seat in place, everything connected and 5gals of fresh fuel poured in, it was time to fire her up. After a chug or two she started right up and started leaking just as fast. Apparently the top and bottom halves of the fuel portion of the pump weren’t quite tight enough. Once tightened, I dialed in the carburetor and took her out for a spin by way of a gas station.

20120923_190356.jpg

FINALLY! I made it further than a mile from home!!! Now to load up the mower and head to the girlfriends place.

20120923_111415.jpg

20120923_132250.jpg

20120923_132308.jpg

20120923_132747.jpg

F the haystack, the needle has been found!

21 Sep

After scouring the town for a brass 1/4″ FNPT to 3/8″ hose barb I finally had all the parts assembled to replace Bessie’s entire fuel system; Ni-Terne tank from Spectra, stainless lines from Inline Tube via American Classic Truck Parts, dual action glass bowl fuel pump from Chevs of the ’40s, the rebuilt Leakchester (yes, it’s already leaking) carburetor and base insulator that I installed earlier in the year from an old timer I know who builds em in his basement and 19gal worth of empty fuel cans on loan from friends.

About the almost fruitless hunt for the hose barb…
I decided to go with brass barbs and a section of hose instead of the available tank to line flex hose for a few reasons. One, it’s cheaper and I’ll have to cut it for the filter. Two, I waited till last minute to get the same part at NAPA that I coulda picked up through American Classic for less when I ordered the lines and tank pads. (*smacks forehead*) Still had a four day wait from NAPA … not gonna be in till Thursday. Not gonna work. So, at 1p this afternoon (Friday) the search began for a 1/4″ FNPT to 3/8″ barb. After four and a half hours of driving all over town and running into every big box and mom and pop hardware store, auto parts store and plumbing supply store with a +6′ long pre-bent, fitted and flared section of stainless hose, I headed back towards NAPA with little hope. Of course, my guys came through for me … “Brass is brass, look in the air tool section.” Joe says. Sure enough, there it is. Grabbed it and its infinitely more common counterpart, the 1/4″ MNPT to 3/8″ hose barb for the tank, a section of gas-o-hol safe hose and a clear fuel filter and headed home just in time for date night with my girlfriend.
Mmm… Indian food and patio drinks on a beautifully tepid clear summer evening.

Juicebox.

4 Sep

20120901_152914.jpg

Decided to go with a new tank over boiling and relining the old one for two reasons. One, from what I’ve read relining only lasts so long before it dissolves, allowing the tank to rust again, or it turns to gum and clogs everything. Two, I found the Spectra brand Ni-Tern (nickel/tin plated) tank for less than $150 shipped at RockAuto. No brainer. My time spent preforming the relining process is worth more than the difference in price.

The people at both rockauto.com and Spectra were more than helpful and remained totally friendly when I asked my usual way too many questions.

Towed again.

30 Aug

On Tuesday I pulled Bessie out of the garage and replaced the fuel filter, which was full of red sand, blew out the lines and decided not to replace the pump until I dealt with the rust in the tank. Worst case, I clog another cheap filter. In lieu, I opened up the old fuel pump and cleaned it out best I could without completely disassembling it. Flow looked good everywhere so I put it back together.

Two days later I went for a drive…

20120830_202635.jpg

Got a little further than a mile from the house this time. As I was nearing the top of a long hill and downshifting into second she started bucking and sputtering. Dead. Luckily there was an open used car lot to my left and no oncoming traffic so I was able to coast in and park it next to a vintage Ford firetruck. The owners were good people, said I could leave it there as long as I needed. Even luckilyer, a good friend of mine who also happens to be the dispatcher for my towing company of choice was sitting in a window seat at Steak n’ Shake directly across the street. He called it in as soon as he saw me put the hood up. It gets better. He said the driver exclaimed, “I know the truck and where it’s going, just tell me where it’s at!” when the on duty dispatcher said “Green, white and rust 1951 Chevy picku…”

20120830_204748.jpg

Plug for Bolin towing – www.bolinservicesincorporated.com – every driver (I think I know most of them at this point) has been awesome.

Ol’ farm gurl gits a make over! …Fun stuff! (Pt. VII)

22 Aug

Got around to cutting the original bumper off yesterday and installed a better condition MBC stamped replacement along with a pair of stainless bumper guards. Started a while back when I took the hitch and rear bumper off but wasn’t able to get two of the bolts out of the front so I just left it loosely bolted on.

Also finally did the headlight bucket gaskets, stainless trim rings and seals, and stainless visors.

20120821_141208.jpg

20120821_141229.jpg

20120821_161014.jpg

Turned out to be an original. The rear it came with and the replacements I picked up are all stamped with “MBC” (Michigan Bumper Company?)
20120821_141646.jpg

Difference in bolts. New fully stainless vs old stainless capped.
They’re not a perfect match and the original came with flat heads on the ends and domed for the center three. New are all domed but I like the larger shoulder.
20120821_144914.jpg

Old fog lights. Surprisingly they came right off with a ratchet and a 19mm socket. The glass lenses had ‘Guide Tractor Light’ cast in them. Looks like they used to be red.
(pics to come)

Old fog light mounted as a back-up light.
(pics to come)

New Guide fog lights set in place. …still need to cut the bumper filler/splash apron so the brackets can pass through.
20120821_162152.jpg

More pics…

20120830_183417.jpg

20120830_183439.jpg

Makin’ progress.

13 Aug

Got a little more cutting and sanding done on the stake sides over the weekend. Decided to add a removable board over the gate that slips in between the end pieces and is held in place with removable 1/4″ pins. …I’m pretty proud of the whole shebang. Came out pretty nice for eyeballing the entire thing.

Still needs a couple flat washers, lock washers all round, a bit more sanding and a few coats of varnish.

20120810_182324.jpg

20120810_182006.jpg

20120810_182057.jpg

20120810_182040.jpg

20120810_182237.jpg

.

.

As far as the ol’ girl running goes, I have the pump. Just need to get around to checking all the lines and installing it.

Danger, Will Robinson! Danger!
20120808_154227.jpg

A bit of wood work on a warm summer’s eve…

4 Aug

After returning a ton of stuff to the local big box hardware mega center with no receipt and ending up with a small fortune in store credit, I figured I’d buy what I needed to build the low stake sides I’d been thinking about adding.
Went with 1×4″ white pine for the sides and a 1×6″ for the front. At the rear above the gate I’ll be adding a single 1×6″ removable piece that attaches with cotter pins. All hardware will be stainless.

As the sun set I could see lightening to the west as a storm moved in so I was only able to get the posts, sides and front cut and drilled. …not too shabby for mocking it all up by sight and eye-balling all my cuts and holes.

20120804_181516.jpg

20120804_182552.jpg

20120804_203755.jpg

20120804_203820.jpg

Better pictures to come…
The plan is to cut the final pieces then sand and start varnishing everything this week.

Since the rain blew in I figured I’d switch gears and work on the horn for a bit. Sounds great, just needs paint.

20120804_220145.jpg

(Cool site on the Delco Remy Division of GM – http://www.delcoremyhistory.com/Products/horns.htm)

.
As for getting the ol’ girl running, I’m waiting on a dual action glass bowl fuel pump that is currently en route before pulling things apart. Currently she runs well enough to move her in and out of the garage and around the block. …I don’t dare go any further than that for fear of another tow.

…make that three tows.

31 Jul

20120731_174812.jpg

Tow number three in less than a week.

Seems like fuel. Pump diaphragm or carburetor float. …vapor lock maybe? …we’ll see.